Whether the wall is dry decides which of these ideas is yours, and every finish here, from wood paneling and brick veneer to stone, wainscoting, and murals, goes up only after the cracks are sealed and the water source is fixed.
The ideas run from the cheapest option, leaving the concrete block exposed, to wood paneling, brick veneer, stone accents, decorative wall panels, and a lit niche cut into the concrete.
Once the wall is sound, the choice comes down to how much light the room gets.
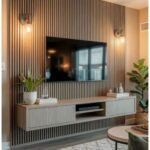
1. Wood Paneling or Shiplap

Dark wood paneling works best in a basement that gets sofa-and-lamp lighting rather than bright overhead light, because it reads as den instead of dungeon. The deep brown absorbs glare and gives plain concrete a warm, textured cover.
Leather seating and a bold rug keep a dark wall from going heavy, so add at least one of each.
If the room needs to feel lighter, shiplap in a paler stain or paint gives the same texture with less gloom.
2. Exposed Brick or Brick Veneer

Red brick in a hallway does the work of a gallery wall without a single frame.
Real exposed brick is rare in basements, so brick veneer is the practical route for most budgets, and I’d pick it over trying to fake the look with paint.
A big mirror across from the brick bounces light down a narrow space, which basements need.
3. Stone Accent Walls

A stone accent wall earns its place on one surface only, and a stairwell is a smart spot because everyone passes it. Light, textured stone catches shadow and looks richer than its footprint suggests.
I’d keep the surrounding walls plain or dark so the stone stays the focal point. Spread across a whole room, it would feel heavy and cost far more, so one wall is the version I’d choose.
4. Decorative Wall Panels

Overlapping hexagonal panels with a backlight strip tucked behind them give a wall depth that paint never will. The warm yellow glow doubles as low ambient light, handy in a basement with few windows.
I’d choose white panels so the light color does the talking, and I’d plan the strip’s power cord before mounting anything. Hiding wiring after the panels are up is the annoying part of this one.
5. Custom Murals

A mural lets one wall, or a run of pillars, carry the whole personality of a room, and abstract shapes in red, yellow, blue, and green forgive uneven hand work better than realistic scenes do.
That makes this a fair DIY job.
Painting pillars along with the walls ties the room together and hides awkward obstacles.
Sketch the shapes in pencil first, tape the edges, and keep the palette to a few colors. Picking a playroom, office, or lounge purpose first makes the colors easier to choose.
6. Wainscoting or Board-and-Batten

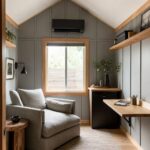
Board-and-batten in dark gray gives a basement wall dimension, and a geometric layout makes it read as a feature rather than a plain panel job. Painting the boards and gaps one color keeps the look clean and hides small gaps.
I’d restrict it to a single accent wall.
7. Exposed Concrete Block Walls

Raw grey block is the cheapest wall finish there is, because the work is already done.
Leaving it bare suits a basement that already has polished concrete floors and industrial lighting, where the wall and floor read as one material family.
Bare grey block reads cold on its own, so bring in warmth through what sits against it: a deep-colored sofa, a wool or jute rug in a warm tan, and lamps with 2700K bulbs.
I’d stick with that pairing: one saturated color, one soft neutral, and nothing busy on the wall itself.
8. Illuminated Concrete Wall Niche

A recessed niche in textured grey concrete, framed in dark wood and lit around its perimeter, turns a plain wall into a display spot. Warm light rakes across the rough surface and makes the texture the feature.
I’d keep the surrounding walls white, as they are here, so the niche is the only thing drawing attention.
Plan the perimeter lighting and its power cord before the wood frame goes up, since hiding wiring afterward is the annoying part.
9. Concrete Block and Wood Shelving

Wooden shelves resting on concrete block supports make a pantry out of a bare basement wall, with no brackets drilled into the concrete.
Stack the blocks, lay a board across, and repeat for as many tiers as the wall height allows.
For jars of preserved food, I’d choose thick boards so the shelves don’t sag under the weight. Keep the layout simple and the aisle clear, and leave room to reach the pipes overhead.
Waterproofing Solutions
Waterproof and insulate before any wall finish goes up. Paneling, veneer, or paint over a damp wall traps moisture behind it, and mold follows.
Start with the cracks: seal them first.
Then look outside, because drainage problems cause a lot of wet walls. The soil should slope away from the foundation, and the gutters should be clean so roof water doesn’t pool beside the wall.
Sealants and coatings add another layer of defense. If water keeps showing up, a sump pump is the next step, and it works best alongside clean gutters.
Fix the source before you build. Repairing a finished wall costs far more than sealing a bare one.
Basements are surrounded by soil, and moisture in the soil can leak through cracks in walls or seep through the concrete itself, resulting in damp or humid conditions indoors.
— Bob Vila
Maximize Natural Light
Basements rarely get much daylight, so the wall color has to do the work. A light paint on bare walls makes the room feel larger and more welcoming, and it costs very little.
If you have a window, keep it clear.
Move tall furniture and shelving away from it, and skip heavy curtains. Let whatever daylight comes in reach the walls.
Partition walls can block light, so place them where they won’t cut off the window. Built-in storage along the darker side of the room keeps clutter off the floor and out of the bright zones.
Insulation matters for comfort too. A warmer wall makes the room easier to spend time in, whatever the lighting.
Durability Considerations
Pick materials that tolerate moisture, because even a dry basement sees humidity swings. Paint-grade trim, sealed surfaces, and masonry-friendly finishes hold up better than raw wood or untreated paper-faced products.
Choose finishes you can wipe or scrub. A wall that takes a damp cloth will stay good-looking with almost no effort.
Leave a small gap at the floor edge where possible, so a spill or minor leak doesn’t soak the bottom of the wall.
Check the base of each wall a couple of times a year for stains, soft spots, or a musty smell.
Catching a problem early keeps a small fix from becoming a full tear-out.
Frequently Asked Questions
What is the best material to finish basement walls?
For a whole basement, drywall is what most people end up hanging, and I’d buy the moisture- and mold-resistant panels, usually sold as green board or purple board, instead of standard sheets.
For accent walls, paneling, shiplap, brick veneer, and stone are the options I’d pick.
How can I cover concrete basement walls cheaply?
Leaving the concrete bare is the cheapest route, but a coat of light paint is the next step up and makes the room feel larger. Inexpensive paneling or fabric panels are the next step up for a quick change.
Raw concrete block is cheaper still, since leaving it bare skips the finishing work, as long as you warm it up with a rug, a deep-colored sofa, and 2700K bulbs.
Do I need to waterproof my basement walls before finishing?
Yes.
Cover a damp wall with paneling, veneer, or paint and the moisture stays trapped behind it, which is how mold gets started. Seal cracks first, check that the soil slopes away from the foundation, and keep gutters clear.
How do I frame a basement with concrete walls?
I frame a new wall a small gap inside the concrete instead of fastening to it.
Use treated wood wherever lumber touches the concrete, such as floor plates or furring strips, and ACQ-compatible fasteners, because ACQ-treated wood corrodes ordinary nails and screws.
Put faced rigid foam board directly against the concrete, because moisture can ruin fiberglass batts. Local codes often require moisture- and rot-resistant materials, and many homeowners hire a carpenter for this job.